Kasahara Taping Treatment (for pain-free cases)
Heel Taping
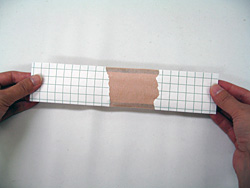
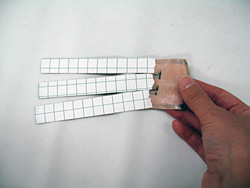
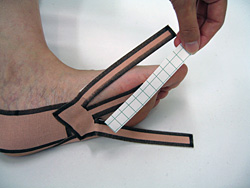
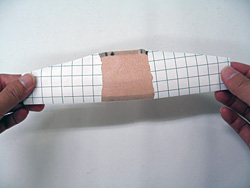
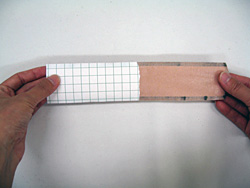
Tear the paper backing from the center of an X cm length of tape
Apply to heel at an angle without over-stretching.

The tape along the outer edge of the foot should be a bit longer than it is on the inside of the foot.
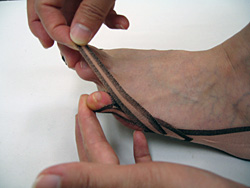
Big Toe Taping
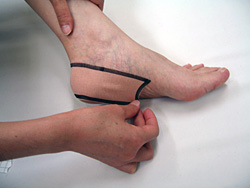
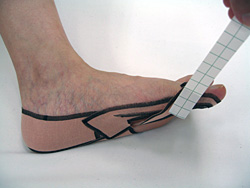
Remove the paper backing from the uncut portion of tape and apply it to the bottom of the foot, overlapping the end of the heel tape, towards the inside of the foot.
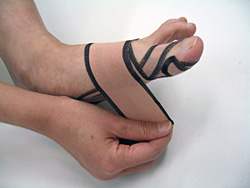
Carefully pull your big toe outward and apply the middle section of tape to the side of the first joint of big toe, then apply remainder of tape in a circle t to the base of the big toe, making around without stretching it from behind.
Stretch over the above tape till the first joint of big toe and make a round from behind without stretching. Then, with the below tape, stretch over till the first joint and make a round from the front without stretching.
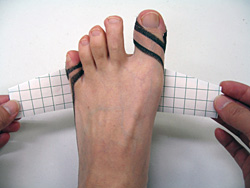
Little Toe Taping
Remove the paper backing of the uncut section of tape and apply it to the side of the little toe, slightly overlapping the heel tape.
Carefully pull your little toe outward and apply the above tape along the side of the little toe, then wrap the remaining tape behind the toe in a loop.
Carefully pull your little toe outward, using the below tape, wrap around the little toe from the inside-out. Do not apply tape to the toenail.
Sole Transverse Taping
Remove the center section of the paper backing.
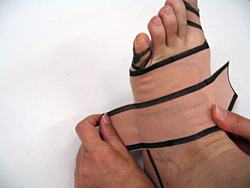
Apply tape to the bottom of the foot, at the base of the toes. Carefully pull the tape towards yourself to rebuild the transversal arch.
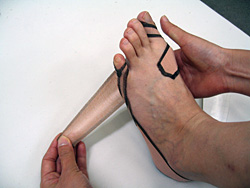
Be careful not to stretch the tape over the top of the foot but only on the sole.
Basic Taping 1
Remove half of the paper backing from the tape.
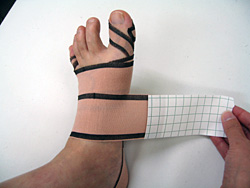
Starting on the inside of the foot, wrap the tape under the foot and then over the top.

Be careful not to stretch the tape over the top of the foot but only on the sole.
Basic Taping 2

Remove half of the paper backing from the tape
Starting from the outside of the foot, wrap the tape over the top then onto the bottom of the foot, slightly overlapping the “Basic Tape 1”.
Be careful not to stretch the tape over the top of the foot but only on the sole.
If you have questions regarding the taping method, we recommend making a treatment appointment.